
I’m going to show you how to make any of my ornaments, they all follow the same procedures – it’s super quick and easy. (For the purposes of this tutorial, let’s pretend my embroidery hoop is clean… mkay?)
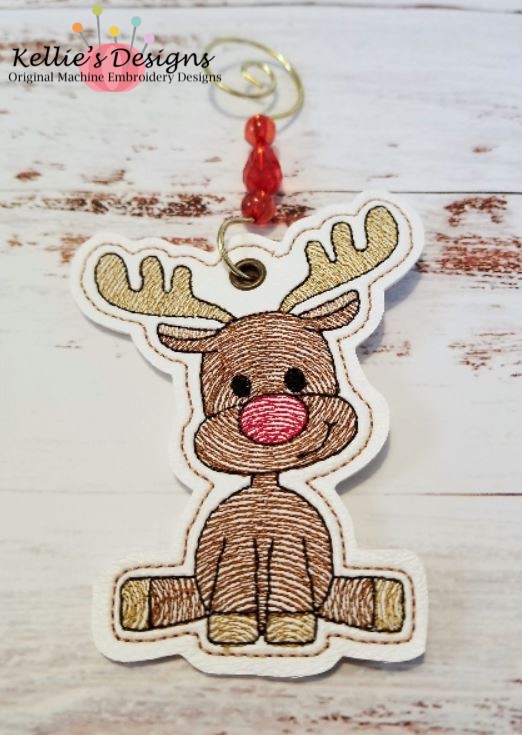
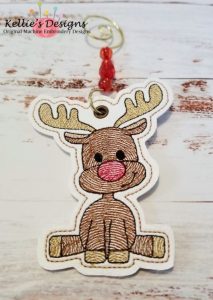
Rudolph Ornament can be found here!
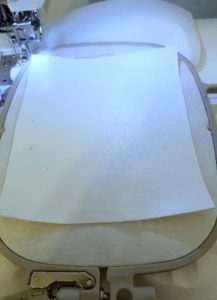
Step: 1. Hoop 1-2 pieces of cut away stabilizer. I like cut away because I think that it helps the vinyl hold the stitches better and it adds a lot of stability to the design. I say 1-2 pieces because if you are using a thin vinyl – you’ll want to make sure to use 2 pieces so the vinyl doesn’t warp. I typically use marine or promo vinyl for ornaments because it can handle the dense stitching well.
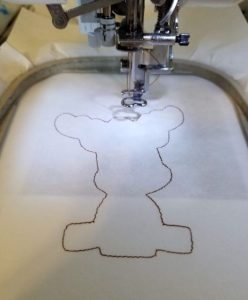
Step 2: Color change 1 is stitched directly on the stabilizer. This is your vinyl placement line. After you stitch the placement, float your vinyl over the placement line – secure with tape so the vinyl doesn’t shift. You’ll want to make certain your vinyl completely covers this line.
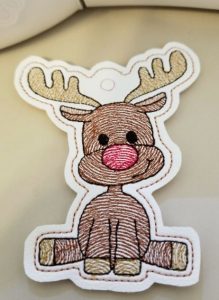
Step 3: Color change 2 – this is the body and the face of the reindeer.
Step 4: Color change 3 – this is antlers and hooves.
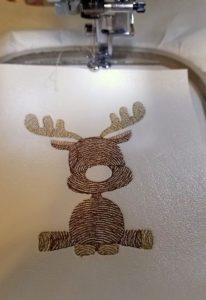
Step 5: Color change 4 – this is the inside of the ears.
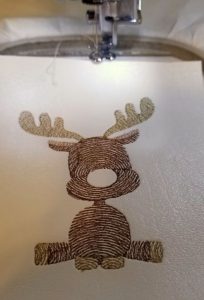
Step 6: Color change 5 – Rudolph’s nose
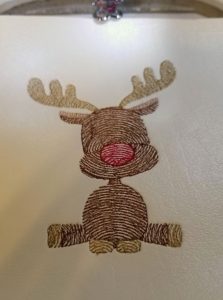
Step 7: Color change 6 – Stitches the eyes and the the outline.
Omg! How cute is this?
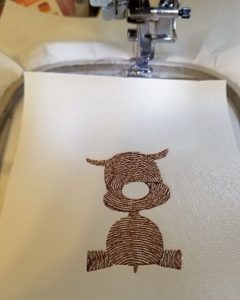
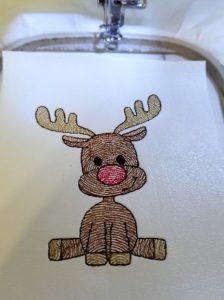
Step 8: Color change 7 – This is your placement for the grommet. You can skip this step if you are comfortable placing the grommet without a reference. (I usually use a thread color the closely matches the vinyl color in the event that I don’t center the hole perfectly. Yes, it happens!)
Step 9: Remove your hoop and place a piece of backing vinyl under the hoop. Secure with tape and double check that ALL your stitching is completely covered. Put your hoop back on the machine.
Step 10: Color change 8 – This is the final bean stitch around your ornament.

Step 11: Unhoop, cut out your ornament carefully making sure you don’t clip into the bean stitches.
Step 12: Install your eyelet or grommet. (Tip: I mark the center of the the grommet placement circle with a Sharpie – that way when I’m using my crop-a-dile to create the grommet hole, I use the center marking point as my reference point.

That’s it! You’re all done!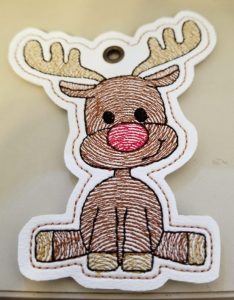
You can see all of our ornaments here!!
Copyright 2019. All Rights Reserved.
Kellie’s Designs
www.kelliesdesigns.net
Digitizing license from:
www.scrappindoodles.ca
Thanks for the tutorial, I’ve seen so many cute ornaments but have been really intimidated. I bought one of yours and will try this today. I’ll be back for more 💓
The first ornament can be intimidating for sure – but they are so fun to make! Good luck!