
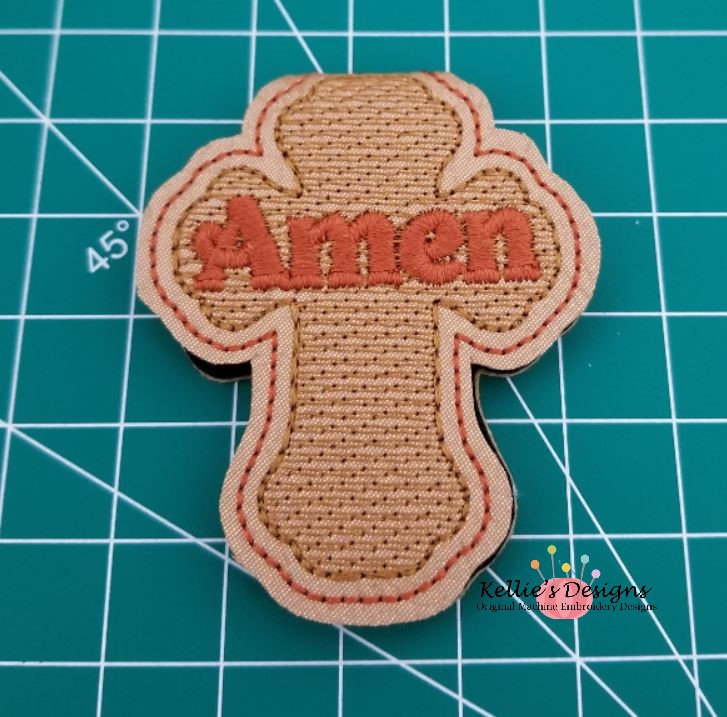

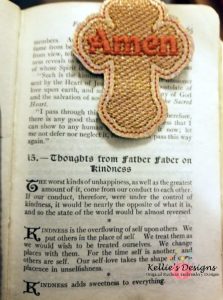
Amen Magnetic Bookmark
3.75 x 3.86 inches (diagonal in hoop), 4300 stitches, 4 color changes
Also included – 2 designs in a 5×7 hoop
Supplies:
*Regular embroidery supplies, stabilizer, thread, scissors etc.
*Thin vinyl for the front – remember, this will be used inside a book so you don’t want anything thick.
I used oly fun for the back, but you could also use a thin vinyl like chalkboard vinyl or something that doesn’t fray. Cork is also very thin and works wonderfully!
*Glue or hot glue gun. I’m a fan of E600 glue.
*Thin strong magnets – I prefer to use a small metal disc on one side and a thin strong magnet on the other. I have tried many different variations trying to keep the bookmark as thin as possible and this is what works for me. Links to the items I used are listed below. You could also use thicker earth magnets if you don’t have a problem with the thickness – they are very strong and I would recommend to only use one on the backside and a small metal disc on the front. Otherwise you’re really going to have to pull to get the sides apart. I did try magnetic tape and I wasn’t a fan of it for these bookmarks because I found that it can curl and seemed to pull away from the bookmark and that added thickness to the project, which I was trying to avoid. I just didn’t like it – but that was my preference. Obviously you can use whatever you want and have on hand. If you find something that I haven’t mentioned that you like – please let me know!!
*Clips (to hold the magnets initially why they are drying)
*My supplies are listed below.
Color Changes:
CC1: Flesh Pink – Placement stitch – stitch directly on stabilizer and cover with vinyl
CC2: Black – Cross details
CC3: Red – Amen
CC4: Appliqué Material – Place backing under hoop and run final bean stitch
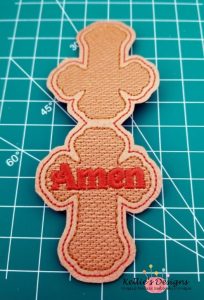
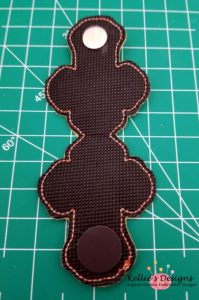
After sewing is finished. Unhoop and cut out your designs. Using my included photos as reference,.
attach your magnets. As I stated previously – I like to use a strong magnet on what would be the backside of the bookmark and a small metal disc on the front. Glue your magnets using a strong adhesive like E6000 (which is what I use) or a hot glue gun. If you are using E6000 or something similar, place clips on the magnets to hold them in place while the glue cures. With E600 – I wait 24 hours. I take the clips off after a few hours. so they indent the vinyl.
*TIP: I am extremely impatient and I tried to use one of the bookmarks after 12 hours because it looked like the glue had dried. Nope, it pulled the magnet right off. You *have* to follow the curing time for the glue. I had to start the drying time over because I had to re-glue it. lol Follow directions, Kellie, follow directions!
The following are links to some of the products that I used in this project:
Magnetic Dots: https://amzn.to/3z5aWUb (I use these on the back part of the bookmark)
1/2 in. steel discs: https://amzn.to/40kgBSi (I use these on the front part of the bookmark)
E6000 glue: https://amzn.to/3K64jaj (I use this to glue the magnets on – the sticky stuff on the magnets isn’t sufficient to hold them in place. You’ll need to have more adhesive than it comes with!)
Oly fun: https://amzn.to/3nfVSQO
Cut away stabilizer: https://amzn.to/3yX9bYQ
Embroidery thread: https://amzn.to/3Z6v2Ib
Lg. sewing clips: https://amzn.to/3JB5htO
Kai serrated scissors: https://amzn.to/3ni0Exl
Copper Penny Vinyl from MyPunkbroidery
Copyright 2023 – Kellie’s Designs
Disclaimer: I am an Amazon affiliate – which means that I may receive a small commission based on qualified orders placed through links I share. This in no way impacts your pricing and I only recommend items that I personally have purchased and used.