
Double Keychain Tutorial
Single design plus multiples for 4×4 (5 in hoop) and 5×7 (9 in hoop)
Dimensions: 3.72 inches x .50 inches, 475, 3 color changes.
FINISHED SIZE: 3.5 inches with standard hardware and no keys.
This design is the PERFECT scrap buster!
Supplies Needed:
*Regular embroidery supplies, stabilizer, thread, scissors etc. (Note: I like cutaway stabilizer for most ITH projects unless otherwise indicated. I find that it provides more stability to the finished product.
*Vinyl or leather for the front
*I used oly fun for the back, but you could also use a thin vinyl like chalkboard vinyl or something that doesn’t fray. Cork is also very thin and works wonderfully!
*Hole punch
*1 long barrel rivet, Chicago screw or size 20 Kam snap
*Key chain hardware
*My supplies are listed below.
Color Changes:
CC1: Placement: Placement line – stitch directly onto stabilizer and cover with vinyl
CC2: Placement: Placement line for rivet/snap/Chicago screw
CC3: Bean Stitch: Secure backing under hoop and stitch final bean stitch.
Hoop your stabilizer and stitch CC1 – this is your vinyl/leather placement line. After stitching, you want to cover this line with vinyl and stitch CC2. CC2 will stitch 3 small holes – these are your placement lines for your hole that you’ll use for your rivet/snap or Chicago screw. This design has been tested for all 3.
Before you stitch CC3 – secure your backing under the hoop and stitch the final bean stitch.
After sewing is finished, Unhoop. Using the placement lines you stitched, punch your 3 placement holes. 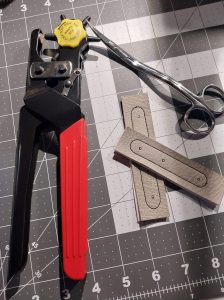
Install your desired closure (snap, rivet, Chicago screw) and keychain hardware. Assemble folding the side that has the shorter distance between holes over the middle hole first and then the side with the longer distance between the holes 2nd. Use photo for reference.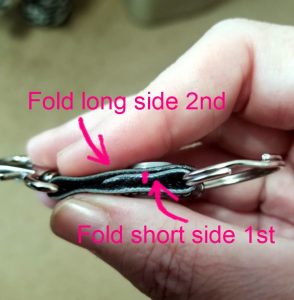
*TIP #1: If you are using leather – there is no need to use a backing. Use tear away stabilizer and completely remove after stitching.
*TIP #2: The backing will only be seen on the end by your keychain hardware. Save your pretty vinyl and use a thinner (cheaper) material like oly fun or chalkboard vinyl.
The following are links to some of the products that I used in this project:
Cut away stabilizer: https://amzn.to/3yX9bYQ
Embroidery thread: https://amzn.to/3Z6v2Ib
Oly fun: https://amzn.to/3nfVSQO
Chicago Screws: https://amzn.to/3ZlFVFX
Lobster Clasps: https://amzn.to/3TUvDvl
Split Rings: https://amzn.to/40osBBX
KAM Snaps: https://amzn.to/3Zr7Cx6
Long Post Rivets: https://amzn.to/3ZvoIKm
Kai serrated scissors: https://amzn.to/3ni0Exl
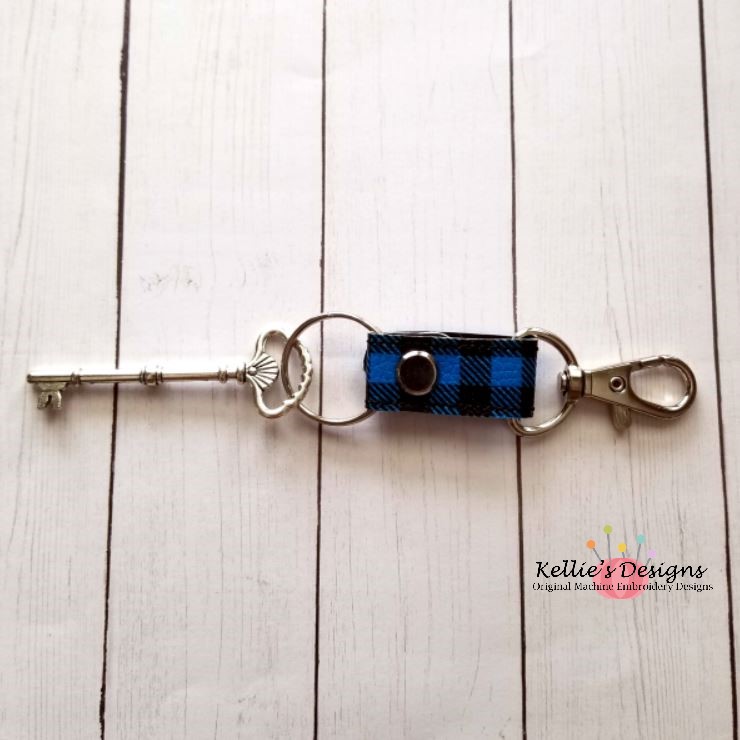
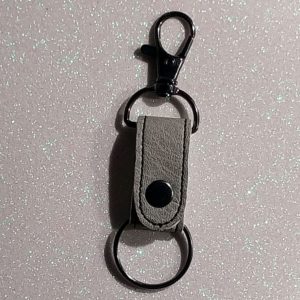
Tester photos!!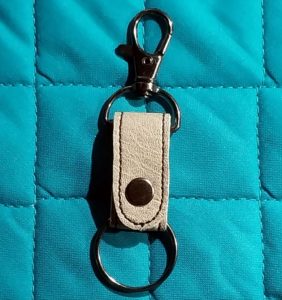
*Vinyl used – Boxer Craft House Grey Faux, fastener is a Chicago screw.
*Vinyl used – Boxer Craft House – Blue Buffalo Plaid, fastener is a Chicago screw.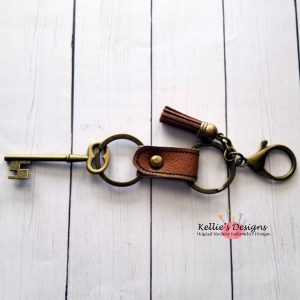
* Genuine leather used with a 8mm brass double head rivet.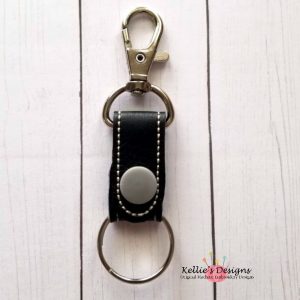
*Vinyl from Joann’s, size 20 regular KAM snap used
Copyright 2023 – Kellie’s Designs
Disclaimer: I am an Amazon affiliate – which means that I may receive a small commission based on qualified orders placed through links I share. This in no way impacts your pricing and I only recommend items that I personally have purchased and used.
Thank you, Angelique for testing this design and bearing with me while I adjusted sizing!