

This tutorial will show you step by step how to create our hand sanitizer holders. Your decorative design included with the holder may be different, but the steps for all holders will be the same.
Hand Sanitizer Holder – Eyelet version (1oz. or 2oz. sizes) 4×4 hoop
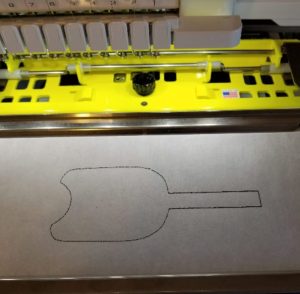
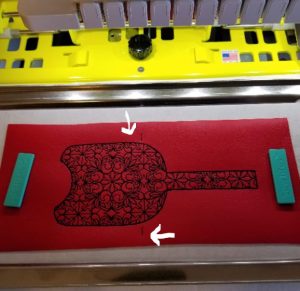
Step 1: Hoop a piece of cut away stabilizer (tear away will work as well, but I find the cut away adds stability to the project) and stitch the 1st color change directly onto your stabilizer. This is your vinyl placement line.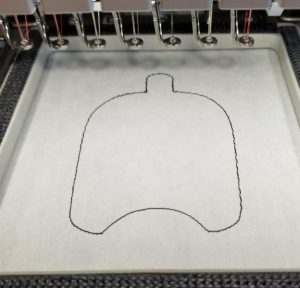
Step 2: Cover the placement line with your vinyl making sure the entire line is covered. Stitch color change 2. That is your grommet placement line.
Step 3:
For the purposes of this tutorial – the entire decorative design is stitched during color change 3 – if you are using a different design, finish stitching the all colors of the design and stop before the bean stitch outline stitches.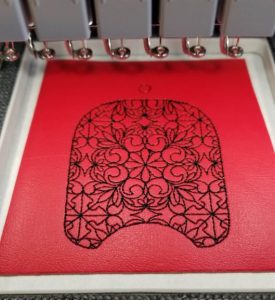
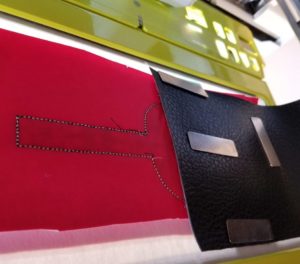
Step 4: Remove your hoop from the machine, but do NOT unhoop your project. Turn the hoop over and cover the entire design with your backing, secure well with tape, pins or magnets. Either vinyl or felt work well – you can also use oly fun or any non-fraying fabric. Return hoop to machine.
Step 5: Stitch color change 4 – this is the bean stitch outline that will attach your backing to the front.
Step 6: Stitch color change 5 – this is just a couple of stitches to show you where to line your pocket vinyl up.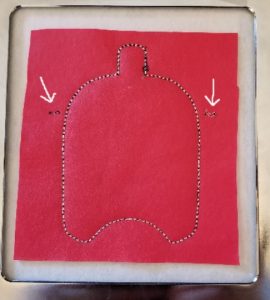
Step 7: Remove hoop from machine – DO NOT UNHOOP. On hoop back, using the placement stitches from Step 6, line up your pocket vinyl just *slighly* covering both sets of stitches – secure vinyl with tape, pins or magnets and return hoop to machine.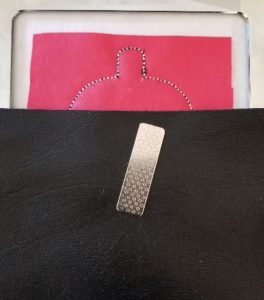
Step 8: Stitch color change 6 – this will attach your pocket to the front of the holder.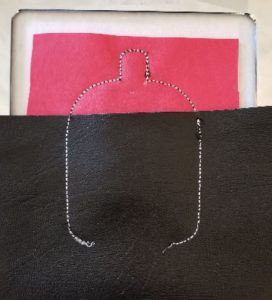
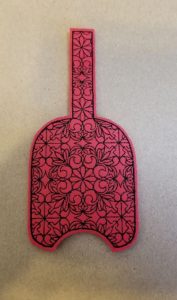
Step 9: Remove hoop from machine, unhoop your project and carefully cut around stitching. 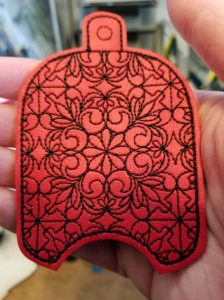
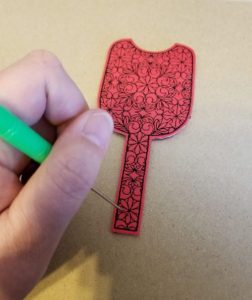
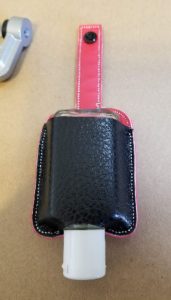
Step 10: Attach your 3/16 inch grommet or eyelet in the placement circle. Attach a key ring into the grommet and insert your hand sanitizer into the pocket.
Hand Sanitizer Holder Snap Tab Versions (1oz. and 2oz. bottle size) 5×7 hoop
Step 1: Hoop cut away stabilizer (tear away will work as well, but I find that the cut away add more stability to the design) Stitch color change 1 directly onto your stabilizer – this is your vinyl placement line.
Step 2: Cover the placement line with vinyl making sure that it’s entirely covered. For the purposes of this tutorial – the entire decorative design is stitched by color change 2 – if you are using a different design, finish stitching the all colors of the design and stop before the bean stitch outline stitches.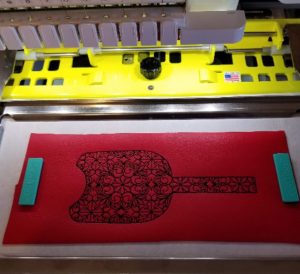
Step 3: Remove your hoop from the machine, but do NOT unhoop. Turn your hoop over and cover the entire design with your backing, secure well with tape, pins or magnets. Either Vinyl or felt work well – you can also use oly fun or any non-fraying fabric. Return hoop to machine. Stitch color change 3 – this is the bean stitch outline that will attach your backing to the front.
Step 4: Stitch color change 4 – this is just a couple of stitches to show you where to line your pocket vinyl up.
Step 5: Remove hoop from machine – DO NOT UNHOOP. On hoop back, using the placement stitches from Step 4, line up your pocket vinyl just *slighly* covering both sets of stitches – secure vinyl with tape, pins or magnets and return hoop to machine.
Step 6: Stitch color change 5 – this will attach your pocket to the front of the holder.
Step 7: Remove hoop from machine, unhoop your project and carefully cut around stitching.
Step 8: Using an awl or similar implement, carefully poke a hole into the vinyl where your snap on the top tab will be placed. Attach the FEMALE snap with the snap side facing toward the back of your holder.
Step 9: For placement of the 2nd snap that will hold your sanitizer inside the pocket, I found it easier to place the bottle inside the pocket and measure the snap placement for your specific bottle type (some are tall and skinny, some are shorter and fatter). Attach your 2nd snap with the MALE snap part facing out.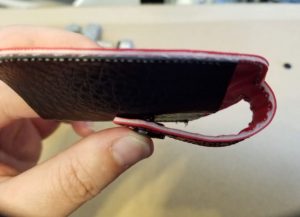
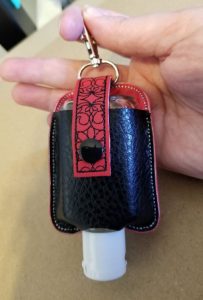
Step 10: Attach a D-ring and you’re finished!
All hand sanitizer designs can be found here.
Hi is it possible to download these or will they be here permanently please?
Hi Pam! The tutorial will always be here!
I need a paper copy instead of an e copy. How can I print this tutorial? I do not want to use my computer every time I make something. Thanks for your help.
Hi Christy! I’m so sorry – I meant to include a copy of the tutorial in the .zip file. I will email it to you and add it to the downloadable file. Thanks for bringing that to my attention!