

General instructions for “Door Hangers” from Kellie’s Designs.
What you will need:
* Stabilizer – I prefer cut away because it adds to the stability of the door hanger, however tear away will also work.
* Front vinyl – approx. 5×7 inches
* Backing vinyl – approx. 5×7 inches
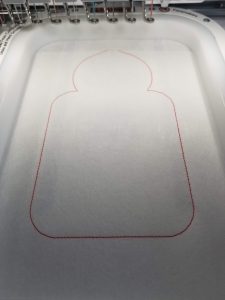
Step 1: Hoop your tear away stabilizer and stitch color change 1 directly on the stabilizer. This is your vinyl placement line
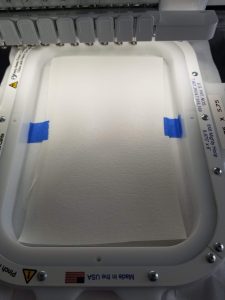
Step 2: Cover vinyl placement line with vinyl making sure all stitch lines are covered. Tape in place if necessary.
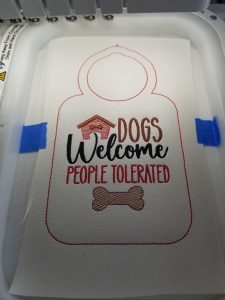
Step 3: Stitch design element onto vinyl.

Step 4: Place backing material UNDER hoop and stitch door knob outline and bean stitch outline that will attach backing to front.
Step 5: Remove hoop from machine – carefully unhoop your project and cut around bean stitch.

Step 6: Carefully cut through all layers INSIDE door knob outline and trim around stitched line. (PRO TIP – I use my hole puncher to carefully punch 2 holes inside of the door knob outline to place my scissors before trimming. That way I’m not bending and distorting the project to get my scissors inside the circle.

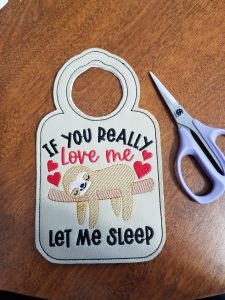
That’s it! You’re done – place on door knob and enjoy!! PS. Don’t forget to post picture in our facebook group!!
Copyright 2022, All Rights Reserved. Kellie’s Designs https://www.kelliesdesigns.net