


Description

Total Stitches: 11273
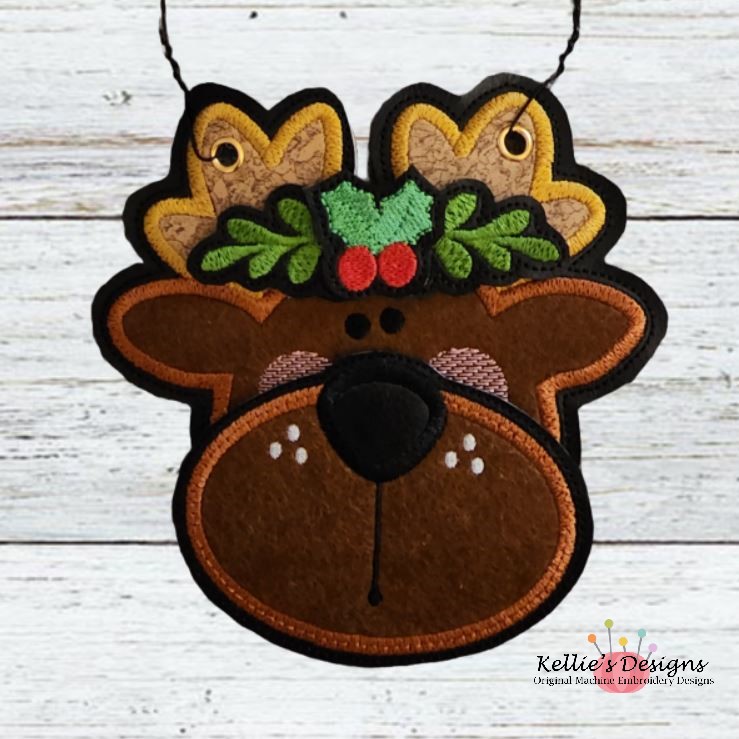
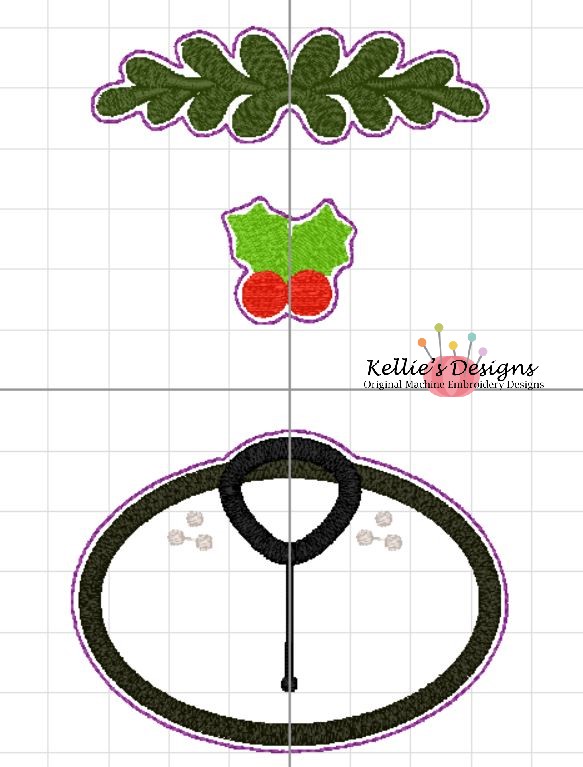
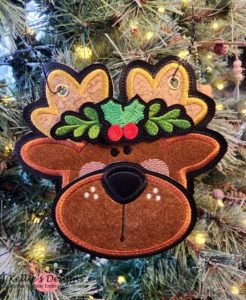
*This design is created in 2 hoopings (like large felties) and the pieces are glued together to create the 3D effect
Project Instructions Included:
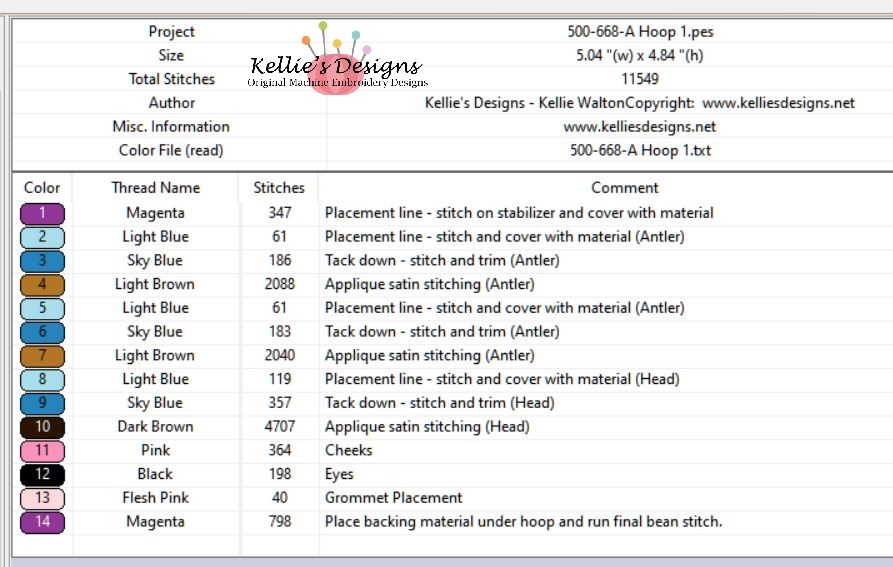
Hooping 1:
Color Change 1: Placement line – stitch on stabilizer and cover with material
Color Change 2: Placement line – stitch and cover with material (Antler)
Color Change 3: Tack down – stitch and trim (Antler)
Color Change 4: Applique satin stitching (Antler)
Color Change 5: Placement line – stitch and cover with material (Antler)
Color Change 6: Tack down – stitch and trim (Antler)
Color Change 7: Applique satin stitching (Antler)
Color Change 8: Placement line – stitch and cover with material (Head)
Color Change 9: Tack down – stitch and trim (Head)
Color Change 10: Applique satin stitching (Head)
Color Change 11: Cheeks
Color Change 12: Eyes
Color Change 13: Grommet Placement
Color Change 14: Place backing material under hoop and run final bean stitch.
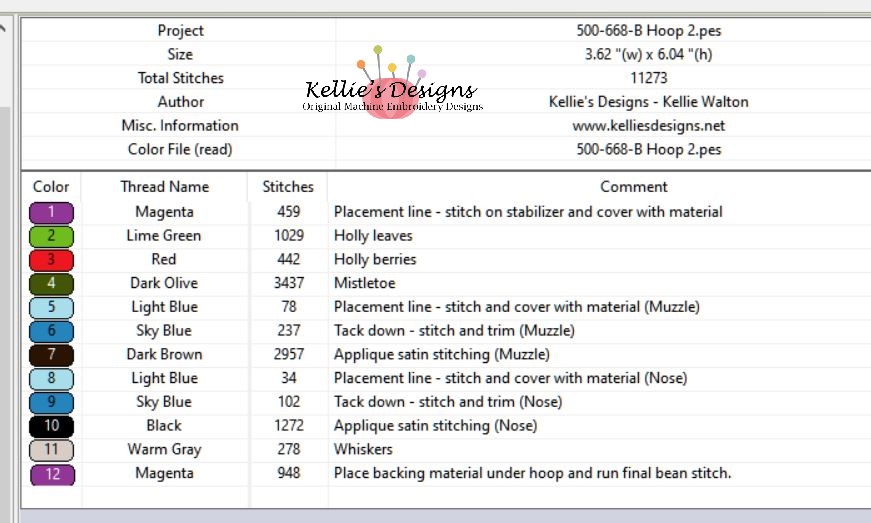
Hooping 2:
Color Change 1: Placement line – stitch on stabilizer and cover with material
Color Change 2: Holly leaves
Color Change 3: Holly berries
Color Change 4: Mistletoe
Color Change 5: Placement line – stitch and cover with material (Muzzle)
Color Change 6: Tack down – stitch and trim (Muzzle)
Color Change 7: Applique satin stitching (Muzzle)
Color Change 8: Placement line – stitch and cover with material (Nose)
Color Change 9: Tack down – stitch and trim (Nose)
Color Change 10: Applique satin stitching (Nose)
Color Change 11: Whiskers
Color Change 12: Place backing material under hoop and run final bean stitch.
Cut out each piece and using photo as guide, hot glue pieces in place and attach hanger. Please refer to video above to see how I finished off this design.
Supplies Used:
White Cut Away stabilizer: https://amzn.to/3yX9bYQ
Black Cut Away stabilizer: https://amzn.to/4638pYp
Embroidery thread: https://amzn.to/3Z6v2Ib
Kai serrated scissors: https://amzn.to/3ni0Exl
4″ duckbill applique scissors: https://amzn.to/3Gcl4y1
Crop-a-dile grommet setter: https://amzn.to/3FQCjEP
3/16 inch grommets: https://amzn.to/3suyDpe
20 guage craft wire: https://amzn.to/4773MxR
Jewelry making pliers: https://amzn.to/40tTs0t
You can find more of my favorite supplies here!
You are purchasing a MACHINE EMBROIDERY DESIGN PATTERN. You will need an embroidery machine to stitch this design out. Please be sure to review the design size BEFORE purchasing. Digitizing license from Whimsical Inklings.
Your downloadable .zip file will contain the following design formats: PES, HUS, JEF, DST, PCS, VIP, VP3, EXP, SHV, EXP, VP3 and XXX.
If you need to convert the file to another format, please convert the PES file as that is the native digitized format.
No return or refund is offered on electronic media.
Copyright 2023 – Kellie’s Designs, All Rights Reserved.
https://kelliesdesigns.net